
Sunday, February 12, 2017
The Opera
The story of the opera is basically Apocalypse Now, but it
takes place in a world where the robots have won the war and now a
combat android has to go to the New York City Containment Zone to kill
an android that is systematically wiping out the last vestiges of the
human race.
Wednesday, February 1, 2017
CNC Guitar Tutorial - Flipping over a 3D body
This dude makes some beautiful guitars. kozmguitars.com
It took me a while to comprehend the geometry starting with his glued-together block of wood. Boy these guitars look comfy.
Wednesday, January 25, 2017
10 luthier shop tips
This is a particularly good set of tips for guitar building and woodworking. Includes ways to clean the fingerboard, using duct tape to remove splinters, clamping weird angles and curved things, gluing on laminate, taping, and making your own fret-removal pliers out of cheap wire cutters.
Monday, January 16, 2017
Oh, and more on the truss rod and mounting
 |
| Pay attention. More tips on attaching a neck. |
Mounting, Truss Rod, and Finishing tips
Mounting your neck, I have come
up with a simple way to mount the neck, you will need,
1.
A reversible drill,
2.
A set of drill bits in 64ths from
1/16th-1/4"(you will be able to assemble your instrument with this set.)
3.
A quick grip clamp with the soft rubber pads.
(optional)
4.
A digital caliper (optional)
To start, fit
your neck to the body, with the body lying flat on a table, or other flat
surface, support the neck so it lays flat in the neck pocket, with a yard
stick, check the alignment of the neck to the bridge, hold your yard stick
along the edge of the neck, from the nut down past the bridge, if your bridge
mounting screw holes are drilled, you want the yard stick to be equal distance
from the edge of the outside two holes. Note the gap in the neck pocket at the
upper end, place a shim of the appropriate thickness at that point.
Now you will pick
the guitar up, stand it on the butt of the body, with the neck pointing
straight up, place the quick grip in the cutout, holding the neck tight in the
pocket, with the handle on the top side of the guitar; check to see if it is
aligned with the shim in place, and also that the heel is tight to the
body. Now find a drill bit that just
fits the holes in the body, this will be used to drill a center dimple for the
mounting hole in the neck, put the drill bit in the reversible drill, make sure
it is tight, now, MAKE SURE THE DRILL IS IN REVERSE, insert the drill bit in
the holes, one at a time and just hit the trigger lightly, going backwards,
this will just drill a small dimple in the center of the mounting holes. When
you’re done with all four, remove the drill bit.
Now you will need
the right size drill bit to drill the mounting holes. In rock maple the
drill bit should be no smaller than the shank of the screw. With a digital
caliper, measure between the threads on your screw, your drill bit should be no
smaller then that measurement, but rather, the same size. On softer woods, you
can go smaller, but not the hard Maple.
Put the
appropriate size drill bit in the drill, at this time. Put one of the screws
along the cutout to see how far into the neck it will go, look to see that it
won't go too far, then place the screw alongside the drill bit in the drill,
adjust the exposed length of the drill bit so it only sticks out the length of
the screw. Tighten the chuck on the drill, and double check that the length is
still right. Go through the mounting hole in the body, keeping the drill bit
centered in the hole. Drill your mounting holes. You’re now ready to mount your
neck. I also use this method to center the holes for the tuners as well.
The Truss Rod - single action =
single rod. What I do is snug up the rod, don't over tighten. Tighten just
enough to where the rod doesn't rattle. With light gauge strings and low
action, these heavier 50's style necks shouldn't need much more attention for some time.
Before I do a string change, I'll check the relief to see if it needs to be
adjusted; if it needs to be, I will snug it up a little when the strings are
off. Always adjust the truss rod with
the strings off, or way loose. If you do a lot of guitar repairs, you will
notice that the guitars that are easy to adjust with the strings on (Gibson –
Gretch - Fender bullets), have a lot more problems with broken or stripped
adjustment nuts. When the torque to twist the nut becomes greater than to twist
the rod, the rod will twist. That's when the trouble starts. If the brass nut
doesn't strip, the rod will twist until it snaps; usually at the anchor (Gretch
guitars are famous for this). It takes a little bit more time to adjust, tune,
de-tune, adjust, tune, check, but done right, you shouldn't need to readjust
for quite some time.
When the truss rod slot is machined from the back, the skunk stripe
fills in behind it. When you drop the truss rod in from the top then
cover it you have no need for it. If you are setup for the one piece
neck and want to put a cap on the top you can still come from the back
to install the rod. The benefits of the rod from the back is you can
have more bow in the rod verses from the top. The cap is 1/4" or less
usually and that lowers the available thickness to work with. This I
believe is why fender went to the veneered cap in the sixties. The rod
from the back is the easiest and fastest way to install the rod. What I
like about it is it seems to need less maintenance then the shallower
rod, like the Gibson's. The Gibson rod adjust easier, but uses more
tension and is always under tension as compared to the deeper rod and
seems to move more in different climates. A friend of mine who works in a
large music store in Reno once told me the majority of his setups were
from traveling musicians going from one gig to the next. The thinner
the neck, the shallower the truss rod bow.
The way I'm truing the fretboard these days is to first machine the fret board radius, I do this so I don't have to remove a lot more later, then cut the back profile. I then put a slight load on the rod and sand it true using a edge sander setup horizontally, similar to a stroke sander but not a stroke sander. This way I true the F/B to the way the truss rod acts with the neck. After it is trued, I remove it from the fixture, it will have a slight back bow. When I drop the tension back off the rod, I will have between .003-.006" positive bow. I've had "O" issues with back bow after changing to this arrangement.
The way I'm truing the fretboard these days is to first machine the fret board radius, I do this so I don't have to remove a lot more later, then cut the back profile. I then put a slight load on the rod and sand it true using a edge sander setup horizontally, similar to a stroke sander but not a stroke sander. This way I true the F/B to the way the truss rod acts with the neck. After it is trued, I remove it from the fixture, it will have a slight back bow. When I drop the tension back off the rod, I will have between .003-.006" positive bow. I've had "O" issues with back bow after changing to this arrangement.
The finish
- these necks come
standard with two coats of nitrocellulose lacquer, this will hold up
well with moderate usage, You can apply more, just sand lightly with
320 grit dry. If your going to use
anything other then nitrocellulose lacquer, the original finish should
be competently removed. What you don't want to do is wet sand between
coats, raw wood will suck it up like a sponge, swelling, cracking ,
twisting, and all kinds of ugly stuff. I dry sand right up to were I get
ready to buff. I use paint thinner (mineral spirits), on the hard
finishes; lacquers
- urethane's - and such. Be careful, even mineral spirits will swell up
the raw
wood. Not nearly as badly as water, but it will swell. Be most careful
around end grain; the very back of the neck, front of the peg head, and
especially the tuner holes. Why you ask, because the tuner holes are almost
all end grain, hard to get enough finish applied to seal it from moisture; any
kind of moisture. I tape this area off, and dry sand it after everything else
is done. I have a lot less problems that way.
Baritone neck
 |
| Unrelated: guinea pigs perfecting hover technology. |
Long
scale conversion neck for the Tele style body with no modification
necessary for intonation, I start with the 25.5" scale and moved it out
two more frets to achieve the 28.629" scale. There's a 10-15 business
day build/handling time on these. I try to keep it to 10 but when it
gets real busy, it can sometimes take a little longer.
My standard Specs for this neck are as follows:
·
28.629" scale.
·
one piece
Eastern Hard Rock Maple (a standard for bolt on necks)
·
single action truss rod
·
black walnut skunk stripe
· T style peg head with stepped tuner holes to
accommodate the die cast Schaller/Gotoh style tuners. The big hole diameter is 13/32" =.404" =10.26mm The upper small hole diameter is 21/64" = .325" = 8.28mm
· T style heel
·
1 & 11/16th
” at Nut
·
2 3/16th ” at Heel
·
14" radius Hard Maple fret board
·
1/8th “ flat bottom nut slot, (nut not included) if you would like a nut, see extras
·
23 frets
Comes with no mounting holes (see extras)
11
.110" wide, .053" tall frets installed, I spray two coats of
lacquer
on the fret board. If you plan to add more lacquer I will sand with 320
dry then buff slightly with fine scotch
guard then install the frets. This makes it easy to add more lacquer if
you choose to do so. Let me know at time of purchase if you would like
me to do that. When I do add more lacquer after the frets are
installed, I take and cut masking tape into thin strips by laying it on a
peace of glass and using a straight edge and utility knife blade. ( I
usually use 12" to 16" strips) You can tailor the width of the strips to
best cover the tops of the frets but letting the lacquer bridge the
fret board and bottom edge of the frets. - no fret
work. (see extras)
·
7/32" black position marker dots
·
3/32" black side dots
·
standard back cut is vintage U, similar to a 54 T/S
round back or a 59 L/P round back, .875" at the first fret, .975" at
the twelfth fret.
EXTRAS If you choose to have any extras done you can commit to buy but don't
pay, send a message with which extras you would like and I will send an
invoice
for the correct amount.
Fret work. I can do a fret mill (level) crown and polish the frets for you as an option
for an extra $25, if you do not have the experience to do this yourself,
this option comes highly recommended.
Bone nut. For an extra $25. I can rough in a bone nut cut in with
nut files and left a little high (factory) left loose so you or your
tech can tailor it to your own taste. To secure when your ready just put
a dab of wood glue on the outside bottom two edges, install on neck
and tighten the strings, the outside two strings is all you need to
tighten, let sit for a hour or so and your good to go. You can put all
the glue you want to glue this on, but the more you put on the harder it
is to replace later on.
Drill mounting holes. For an extra $5. I can drill those for you.
The neck comes with two coats of nitrocellulose lacquer, not meant to
be perfect, but it's a good hard finish that will let you put your
project together with out the hassle of doing finish work yourself.
Friday, December 16, 2016
Fish Bass
Designing an ergonomic bass. The thing I don't dig so much about the bass in that article is that it's designed for your right hand to sit in the middle of the bass. And my interest is in playing near the bridge more comfortably.
Huh. In the early 70's Fender moved the bridge pickup somewhat closer to the bridge.
 I found a piece of old pine in the dumpster behind my apartment building. I thought it would be funny to make, instead of a "tonewood" guitar, a trashwood one.
Huh. In the early 70's Fender moved the bridge pickup somewhat closer to the bridge.

 |
| This graphic is relevant to my needs. |
 |
| Allen Eden guitar neck. Pre-cut bone nut. Massive blank headstock. I need an 11/16 drill bit for the tuner holes. |
Sunday, December 11, 2016
Make a bass drum
So I've had this idea, after seeing the Turangaleela at the New York Philharmonic earlier this year and also having seen the Kachanov Singers, that the orchestral bass drum is actually the most expressive drum there is.
And honestly I'm not getting a lot of push-back from drummers on this idea. The drum can be quiet and round. It can make delightful little "canks." It can be muted, it can be resonant, it can be sharp, it can be LOUD. I mean freaking LOUD.
And if you're going to have a concert bass drum, it should be 40" by 20" deep.
Thing is, they cost around $2700. Also note, though, one of the big tricks is that those come with a sweet stand which completely suspends the drum and lets you tilt it at any angle you want. Which kind of rocks.
But let's experiment with the mind for a while, shall we? Mind. Experiment.
There are some resources on the interwebs for building one's own drums. Thing is the pre-built easily-available drum shells don't get as big as 40".
But there's another way -- building a drum with staves instead of a bent shell.
Stave calculator by Uniontown Labs. It's cool but it doesn't actually go up to 40". And you know you need a 40-inch concert bass drum. But still, it does a lot of the calculations (even if there's a seeming limit in the numbers somewhere which make it output "infinity" in some fields.)
But. Again. Decimal inches? I ain't got time for that. I mean unless we really started making decimal inch rules. Which. I mean I guess I have to be able to find one. But. Ugh. Millimeters. I'd so prefer to work in millimeters.

| Decimal Inches | Fraction Inches | Centimeters | |
|---|---|---|---|
| Rough Diameter | 42.1250" | 42 1/8" | 107.00cm |
| Finished Diameter | 41.8750" | 41 7/8" | 106.36cm |
| Shell Depth | 22.00" | 22" | 55.88cm |
| Number of Staves | 20 | ||
| Joint Angle | 18.00° | ||
| Bevel Angle | 9.00° | ||
| Stave Outer Width | 6.672" | 6 11/16" | 16.95cm |
| Stave Inner Width | 6.434" | 6 7/16" | 16.34cm |
| Stave Thickness | 0.750" | 3/4" | 1.91cm |
| Rounded Thickness | 0.369" | 3/8" | 0.94cm |
| Board Length Required | 800" | Infinity" | Infinitycm |
| Staves per Width | 1 | ||
| Staves per Length | 20 | ||
| Board Feet Required | Infinity' | ||
| Cost Per Shell | $Infinity | ||
Saturday, December 10, 2016
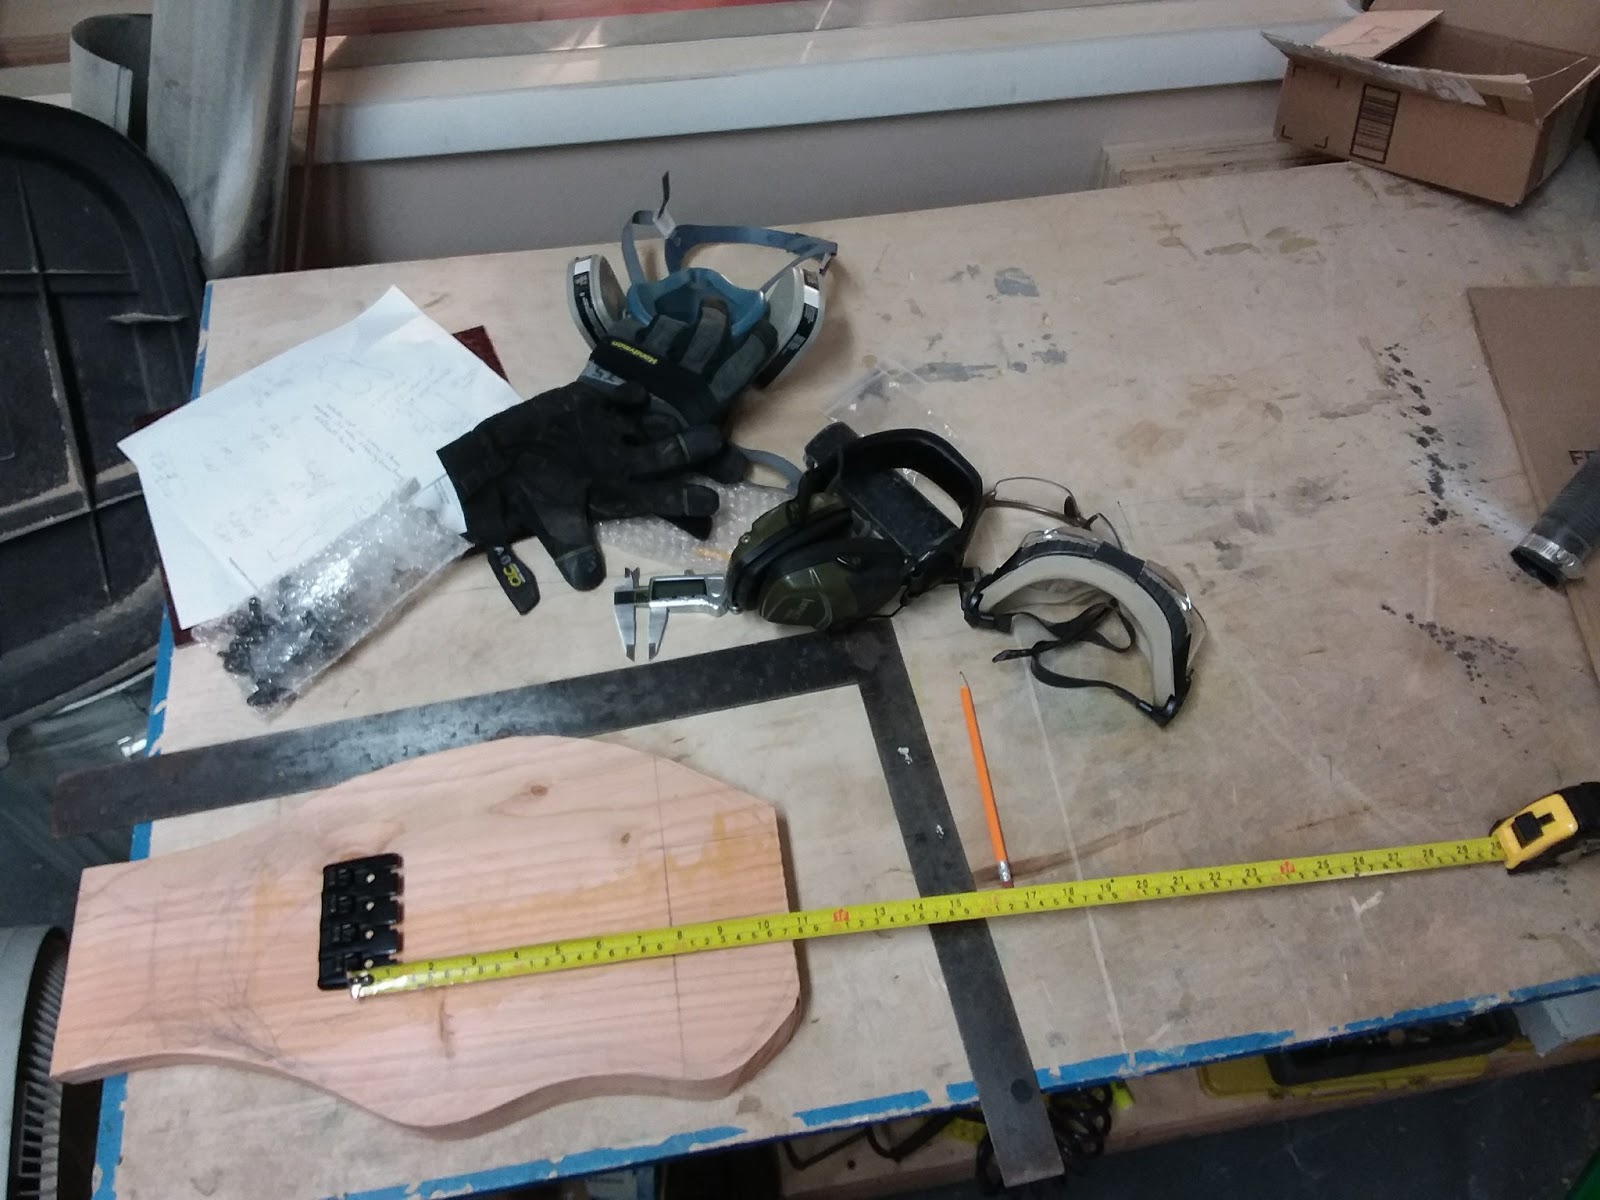
Trashcaster
Among thing I am doing in my copious spare time is building a short-scale (30") bass guitar.
It starts with a piece of wood I pulled out of the dumpster behind my building. I went to FabLab and planed it (the jointer there ain't working because it has an unusual 220v plug so it doesn't go into the socket. I really wish it only had a 110v motor -- or its own transformer. Ugh. I don't want to play with 220, but I'm an American, more on that later) and the piece of wood seems to be a piece of pine.
I thought that instead of making the bass out of "tonewood" I would make it out of "trash wood" and therefore the instrument would be a
Trashwood Guitar
Which amuses me but I don't know how that's going to turn out. I have this idea that the contours of the body will encourage playing near the bridge. Furthermore I (perhaps mistakenly) think this is a good thing.
I so wish we could just use the metric system here. Unfortunately all the rules at the Lab are Imperial and so all the detail work needs to be done Imperial. But adding and subtracting 9/32 of an inch from 4.183" (yes, we flop back and forth into decimal inches) is just too much for my little brain. I mean come on, if we're going to use decimal inches can we puhleeze just use millimeters?
Sigh.
Anyway, I get to go on a journey of discovery where I learn how to rout a Strat-style neck pocket. Also I have to figure out if the wiring all goes under a pickguard or if I rout from the back of the bass so that little holes poke up through the wood for the volume controls and jack. I dunno.
Two humbucking pickups. And they should be at 25.25" and 27" from the nut. Just like Ethan says.
I'll be experimenting with the MM 4 string bass humbucker by Warman in the neck position. The website says it is "Overall size, excluding the 3 mount holes is 90mm x 48mm and 20mm overall depth."
And the bridge position will be their Jazzbar.
 So 25.25" is 641.35mm. That's where the neck pickup wants to be.
The bridge pickup wants to be at 685.8mm.
We will round these numbers off.
The neck is 762mm scale.
The ideal neck pickup position is therefore 121mm from the bridge.
The idea bridge pickup position is 76 mm from the bridge.
My calculations show they will just barely fit.

 |
| Not on purpose but it turns out I'm making a guitar that kind of looks like a fish. |
I thought that instead of making the bass out of "tonewood" I would make it out of "trash wood" and therefore the instrument would be a
Trashwood Guitar
Which amuses me but I don't know how that's going to turn out. I have this idea that the contours of the body will encourage playing near the bridge. Furthermore I (perhaps mistakenly) think this is a good thing.
I so wish we could just use the metric system here. Unfortunately all the rules at the Lab are Imperial and so all the detail work needs to be done Imperial. But adding and subtracting 9/32 of an inch from 4.183" (yes, we flop back and forth into decimal inches) is just too much for my little brain. I mean come on, if we're going to use decimal inches can we puhleeze just use millimeters?
Sigh.
Anyway, I get to go on a journey of discovery where I learn how to rout a Strat-style neck pocket. Also I have to figure out if the wiring all goes under a pickguard or if I rout from the back of the bass so that little holes poke up through the wood for the volume controls and jack. I dunno.
Two humbucking pickups. And they should be at 25.25" and 27" from the nut. Just like Ethan says.
I'll be experimenting with the MM 4 string bass humbucker by Warman in the neck position. The website says it is "Overall size, excluding the 3 mount holes is 90mm x 48mm and 20mm overall depth."
And the bridge position will be their Jazzbar.
The bridge pickup wants to be at 685.8mm.
We will round these numbers off.
The neck is 762mm scale.
The ideal neck pickup position is therefore 121mm from the bridge.
The idea bridge pickup position is 76 mm from the bridge.
My calculations show they will just barely fit.

Wednesday, November 30, 2016
EB0 2 pickup demo
It's all good times. New pickups in the EB0.
 |
| I wired the guitar like a Jazz bass but without a tone control. |
 |
| I routed freehand without any damage to the finish. I went to drill the hole for the wire from the pickup to the volume pot and I punched a small hole all the way through to the back of the guitar. I'm not showing you that. |
Bassic Testing
I made a little rig. I swept a DiMarzio One pickup across the strings of an Epiphone EB0 bass. I learned things.

I learned mostly that Ethan was right about the pickup location.
Conclusions? Best pickup positions on short-scale bass are at: 25.25" from nut and 26.75" (or 27")from nut.

I learned mostly that Ethan was right about the pickup location.
Conclusions? Best pickup positions on short-scale bass are at: 25.25" from nut and 26.75" (or 27")from nut.
Tuesday, November 29, 2016
Putting pickups on basses
Following is an email (between the "§§§'s") with Ethan regarding the positioning of pickups on short-scale basses.
 I'm going to try to put my DiMarzio One at the 25.25" position on my Epiphone EB0. More on that in later posts!
§§§
Well, I did some thinking and I did some measuring. Many people feel
that the "sweet spot" for a 34" scale bass is where a standard P-bass
pickup resides, which is 28.6" (or close enough) from the nut.
First
I did some measuring to see if all my P-basses were the same, and they
were. Then I measured some other, non-fender basses to see where they
put their neck pickups and, sure enough, they were pretty damn close to
28.6" - G&L, Modulus, Kawai, all 28.6". One exception was Musicman,
who puts the neck pickup on the Sabre closer to the neck, but I never
cared much for the neck pickup sound on a Sabre, which leads me to
believe that this 28.6" may be something like a right answer.
As
it happens, the original, single-coil P-bass places the pickup an inch
closer to the neck. It sounds good there, but it's a very bright
sounding single-coil - very UNlike a split P. Did Leo Fender move it
closer to the bridge when he switched to the split P humbucker to reduce
the muddiness of the newer, quieter pickup? Yeah... probably. Did he
come up with the new measurement scientifically? Almost definitely
not. Did he just get lucky? I doubt it. I'll bet he just tried it in a
bunch of places and chose whichever he liked best.
The
Jazz Bass, which came later than both versions of the P-bass splits the
difference at just over 28", but the pickup splits the difference, too:
single coil, but not as bright sounding as a SC P-bass pickup. I
somehow doubt this is all a coincidence.
So,
where does that leave you? Well, a 30" scale length is about .882 of a
34" scale length, so the numbers on a 30"-scale bass would play as
follows:
SC P-bass: 24.25"
Jazz Bass: 24.9"
Std P-bass 25.25"
Incidentally,
25.25" happens to be exactly where the pickup is on my vintage Dan
Armstrong/Danelectro, which is the only short-scale (30") bass I own,
and it sounds really good there. There's a bass with the same scale as
yours and the pickup is placed right where an equivalently-scaled
P-bass' pickup would be. That's a "lipstick-tube" pickup on there,
which is an overwound single-coil that sounds like the bastard child of a
split P-bass pickup and a P-90.
So in your
position, I would probably choose 25.25" from the nut (to the center of
the pickup) if I were using a humbucker of any kind (including a split
P), 24.9" for a J pickup or any other bass pickup with a bit more
clarity (like the newer, full-range Bartolinis, Nordstrand singles,
Delanos or lower-output EMGs) and leave the 24.25" position alone, as
it's probably not far enough from where your pickup is now to make any
substantial difference.
As far as a bridge
pickup goes, Gibson tended to put them too close to the bridge. I guess
they thought they'd only be used as an addition to the neck pickup.
I'd suggest putting it right between the other pickup and the bridge or
maybe even a little closer to the other pickup. There will be less
difference between the two pickups, true, but there will still be a
difference and what you'll gain is two, distinct sounds that can both be
used as stand-alone bass sounds - something you really can't do with a
stock Gibson bridge pickup.
Now, just to muddy
the waters a little further (because I can), the Musicman Stingray only
has one pickup - ostensibly a "bridge" pickup, although it's far enough
from the bridge to still sound like a [neck] pickup. It sits at 30.6",
which equates to 27" on a 30"-scale bass. A Rickenbacker's neck pickup
is really close to the neck and most people use the bridge pickup as the
main pickup on a Ric. Translated to 30" scale from a Ric's 33" the
pickup would sit at 26.8". In other words, if the scales were equal, a
Ric's bridge pickup sits VERY near where a Stingray's pickup is, which
explains their similar growl.
Jazz basses and
G&Ls place the bridge pickup closer to the bridge, just on the edge
of usefulness as a standalone pickup, IMO. They sit at 31.5 or 32",
depending upon the year. That equates to 27.8" or 28.2", give or take.
Based
on these numbers, I'd shoot for 25.25 for the neck pickup and then try
to squeeze the bridge pickup in there as close to 27" as space will
allow (reality would probably push you closer to 27.5). Sure, it will
put it pretty close to the neck pickup, but you'll end up with two
really useful pickup positions that would still probably work well
together, too.
As far as what pickups to
use.... well, shit. There are an awful lot of options out there. It
really depends upon what you're after. Do you want your bass to still
sound kinda like an EB-0 but on steroids, or are you looking for much
more versatility? There's a pretty staggering array of pickup and
electronics options for bass - everything from pure thud to super hi-fi
with tons of stops in between, and a lot of ways to get both - or, at
least, aspects of both from the same instrument. A lot of it is just
how much planning you want to do and how much you want to spend.
There I go, thinking too much again.
§§§
Here for your dining and dancing pleasure is the schematic for wiring a Jazz Bass.

Subscribe to:
Posts (Atom)
-
I'm re-consolodating my blogs. I know, you wanted them separate. But my little mind just doesn't work that way. All my blogging -- ...
